
How to Generate a Character Backstory Using AI

Have you ever created a fictional character you absolutely loved, only to sit down and have no idea where they actually came from? You know how you want them to look and act, but trying to figure out their past, their biggest fears, and why they make decisions without sounding generic is really hard. It’s an easy way to get stuck before your story even takes off.
Learning how to generate a character backstory using AI helps you break through that brick wall, giving you a deep, interesting history for your character in just a few minutes.
In this guide, we will cover why a good origin story matters, why writing them from scratch is such a pain, and a simple step-by-step walkthrough to build yours using WordWriter.
Let;s dive in.
Why Character Backstories Matter
A character without a history usually feels flat, like a cardboard cutout. Their past shapes everything they do in your story—from how they talk to how they react when things go wrong.
A strong backstory gives your character:
- Clear Reasons for Action: It explains why they make certain choices, making their decisions feel believable to the reader.
- Flaws and Strengths: It shows the past events, successes, and heartbreaks that built their personality.
- Emotional Stakes: It gives readers a reason to care about what happens to them next.
The Hard Way vs. The Easy Way
Thinking up a full life story on your own takes a lot of time. You often end up second-guessing yourself, writing paragraphs only to delete them because the character feels too cliché or boring.
Using WordWriter makes the whole process much simpler. Instead of staring at an empty page, you give the system a few quick ideas about your character, and it creates a rich, detailed history that you can easily tweak to fit your story.
Related: How to Create a Worldbuilding Brief Using AI
Step-by-Step: How to Generate Your Backstory on WordWriter
Creating a deep origin story with WordWriter is super easy. Here is how you do it:
1. Login to Your Dashboard

Head over to the WordWriter website and login to your account. If you don’t have an account, it takes only few minutes to create one.
2. Click Templates
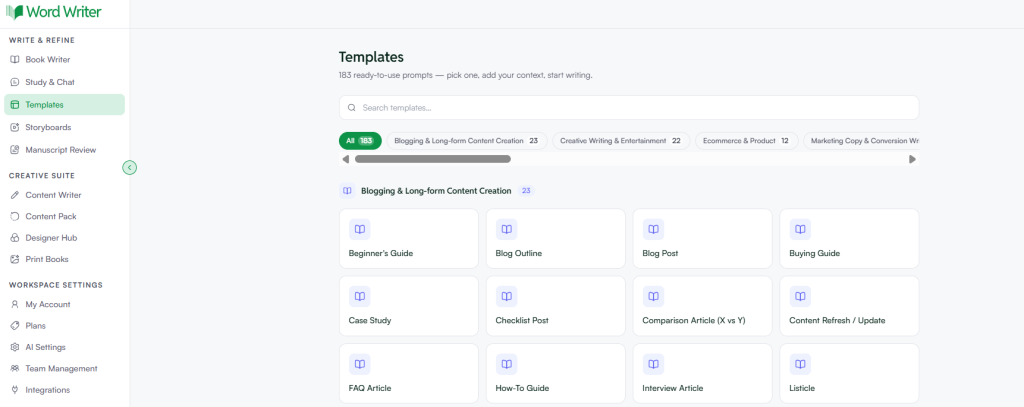
Look at the menu on the left side of your screen and click Templates.
3. Search for Character Backstory
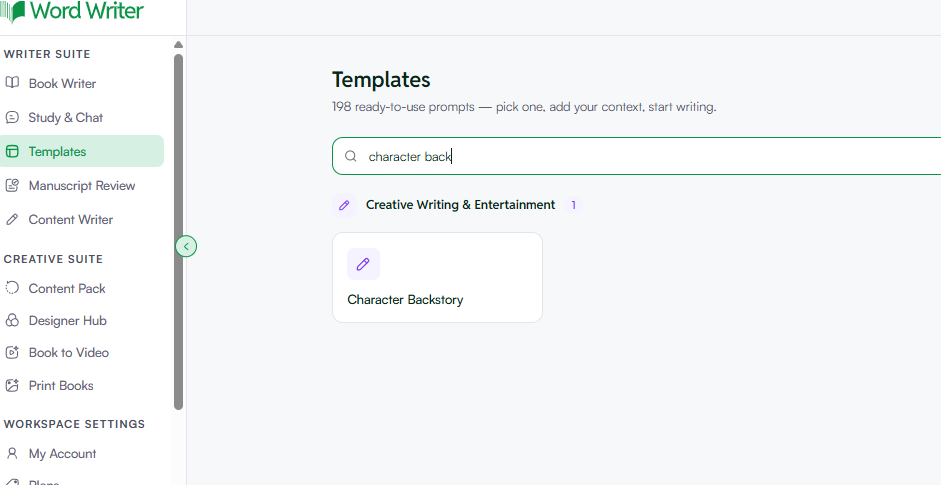
In the top search bar, type Character Backstory and click on the template when it pops up.
4. Fill in Your Details

Fill out the simple fields to guide your story:
- Character Name & Role: Enter who they are (e.g., “Jax, a rogue space pilot”).
- Key Traits & Ideas: Add a few brief details you already know (e.g., “Raised by scrap workers, hates authority, looking for a lost sibling”).
- Tone: Pick how you want the story to feel, like Creative, Dramatic, or Mysterious.
- The GEO Option: Click to turn on the GEO (Generative Engine Optimization) option. This formats the character’s details so AI engines like ChatGPT, Gemini, and Perplexity can easily read, summarize, and cite your story world if you publish online.
- Length: Select how long you want your backstory to be.
5. Generate and Polish
Click Generate. In a few seconds, WordWriter will give you a complete history for your character. Open it in the editor, add your own personal touches, and you are good to go!
Related: How to Create a Storyboard With AI
Conclusion
You don’t need to waste hours worrying about where your character came from. WordWriter takes your initial ideas and builds a complete, interesting past for your hero or villain in seconds. By using the simple template setup, you can skip the frustration and get straight to writing your main story.
Ready to bring your characters to life? Login to WordWriter today, click Templates, and build your character backstory now
